My Arch Linux Setup
My Arch Linux Setup: Minimal Base + Omarchy Theming
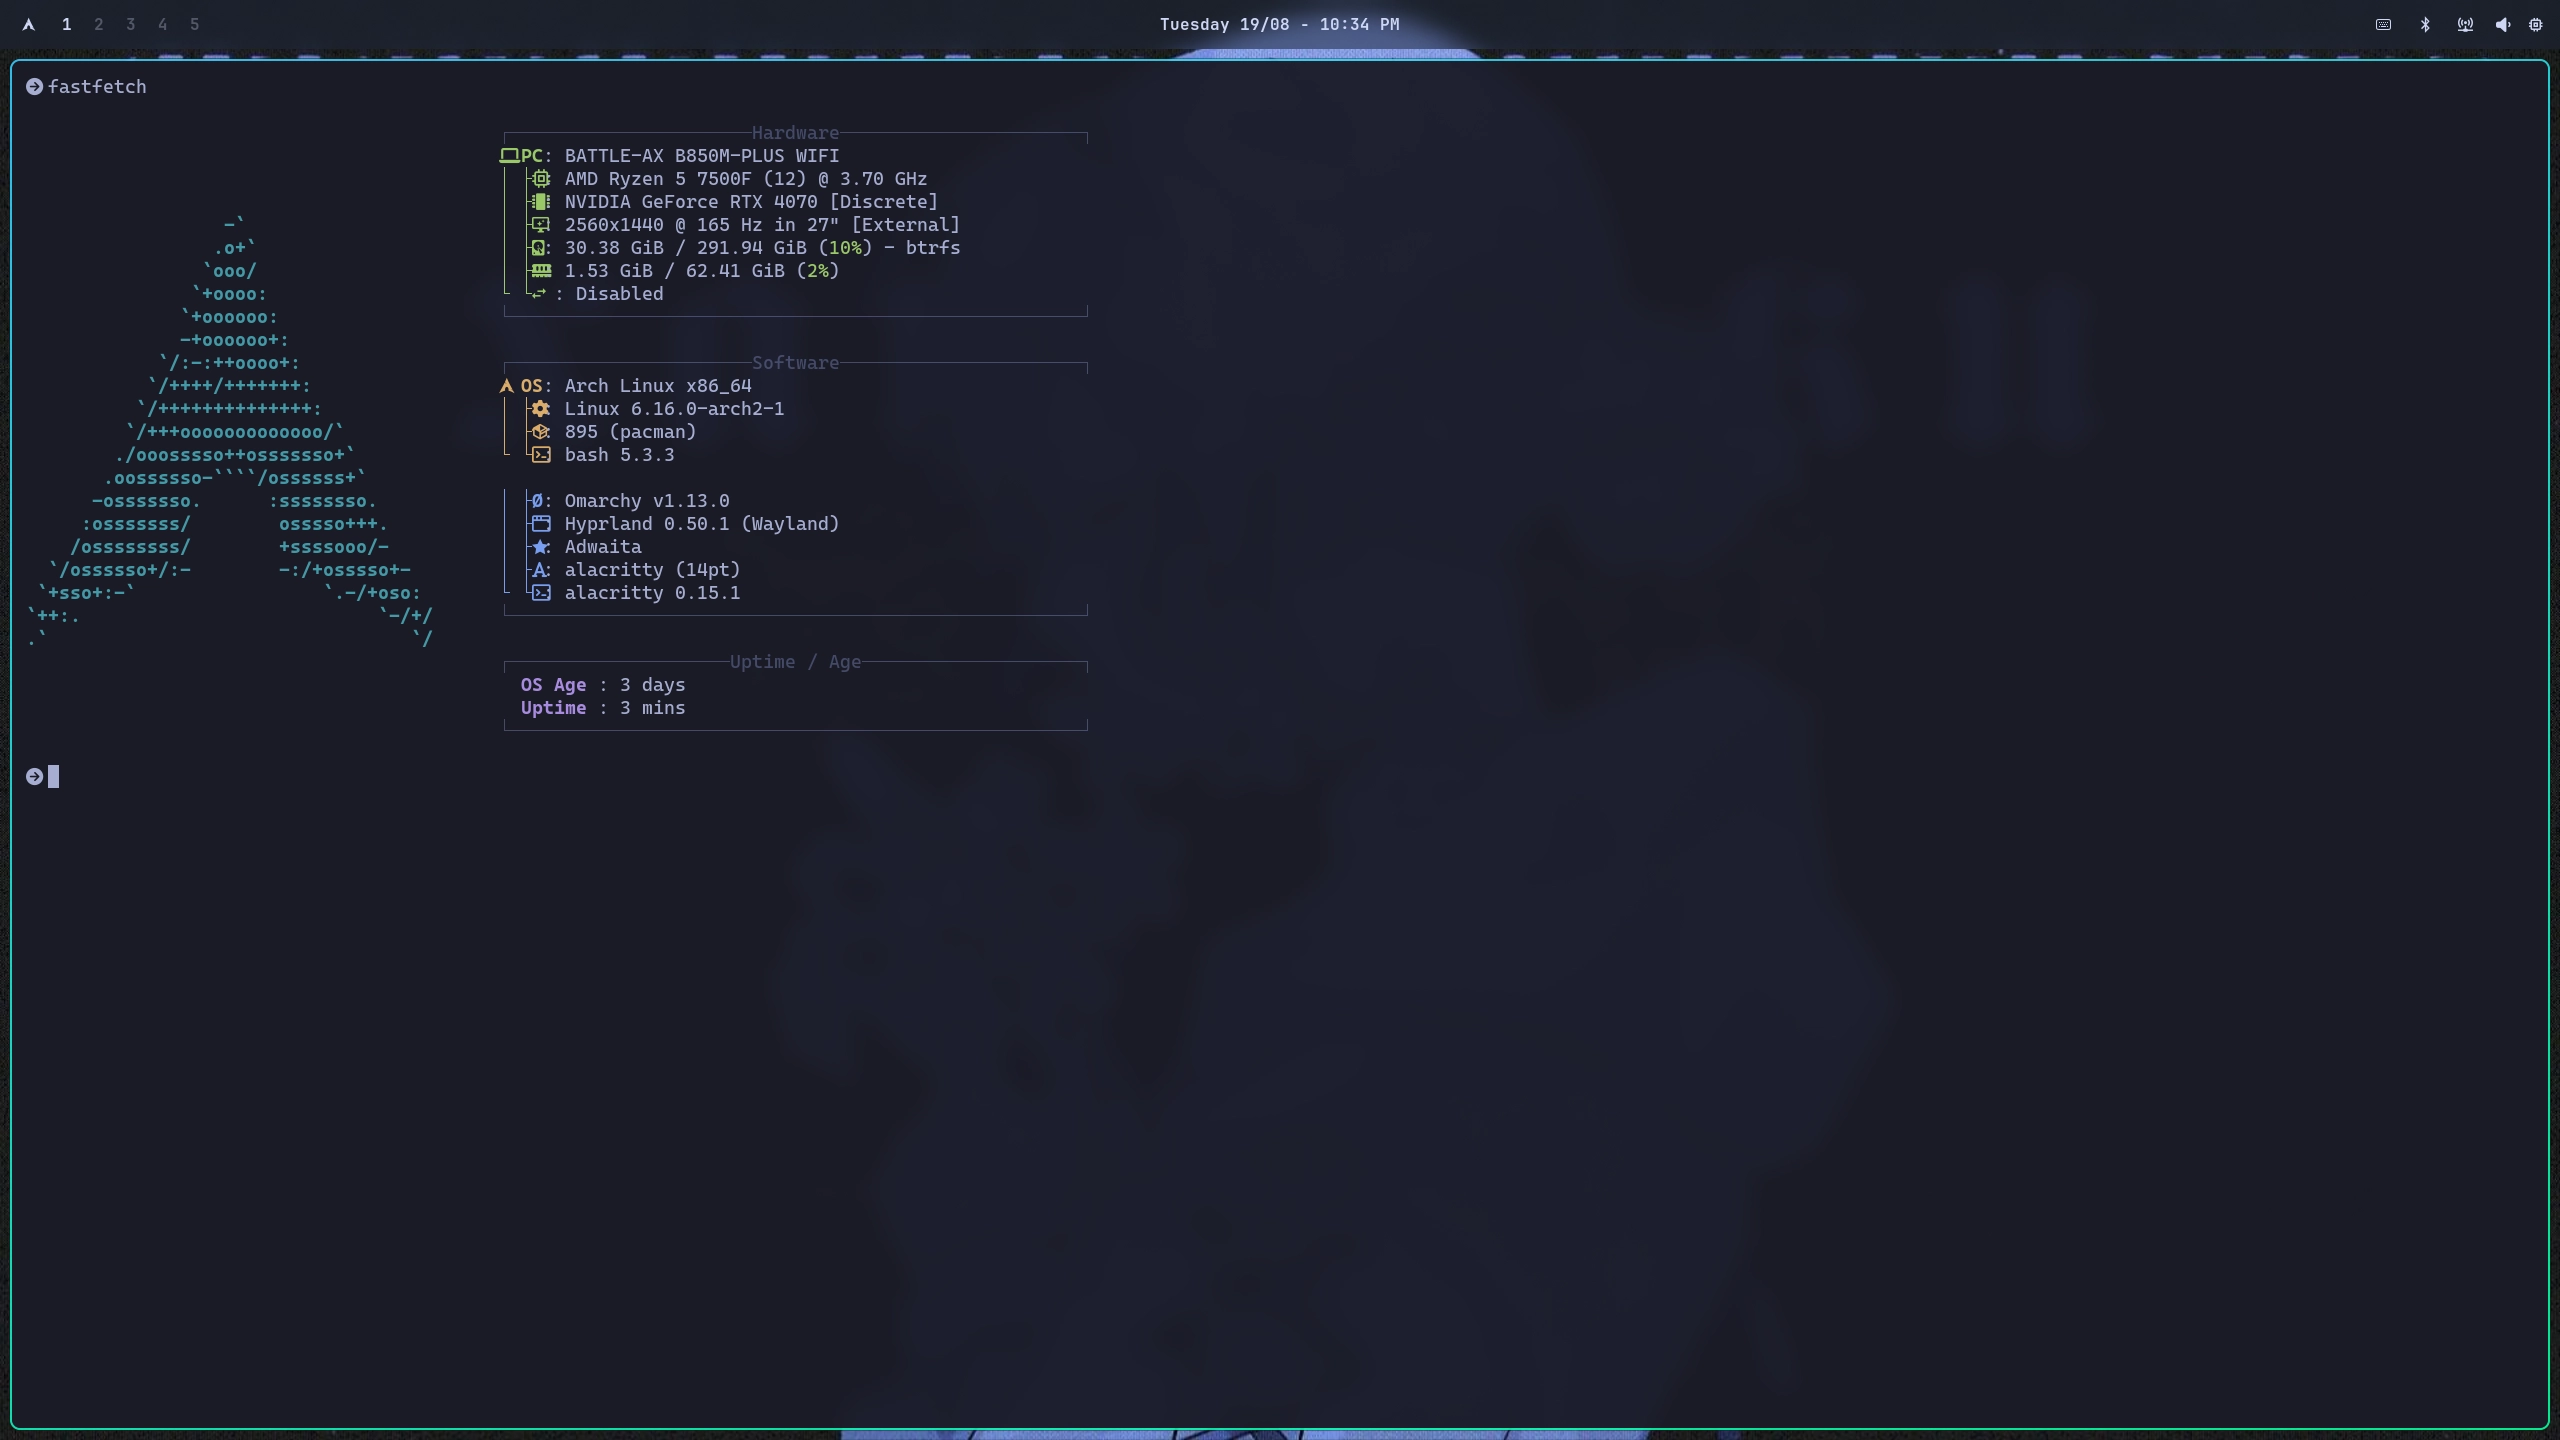
This is mostly documentation for myself so I can recreate this setup quickly, but figured I’d share it in case anyone else finds it useful. I run a pretty clean Arch Linux desktop that combines a minimal base installation with Omarchy’s excellent defaults and theming.
Installation Process: Minimal First, Polish Later
I don’t use Omarchy’s full installer. Instead, I start with a completely minimal Arch installation using the standard archinstall command, then layer Omarchy on top for the polish.
Step 1: Minimal Arch Base
# Use archinstall for a bare minimum systemarchinstallI select only the essentials: base packages, a bootloader, and basic networking. No desktop environment, no extra packages - just enough to boot and connect to the internet.
Step 2: Add Omarchy for Defaults and Theming
# Install Omarchy's base without the applicationswget -qO- https://omarchy.org/install-bare | bashThis gives me all of Omarchy’s excellent Hyprland configuration, theming, and utilities without installing a bunch of applications I don’t want. I get the polish without the bloat.
Application Strategy: One Command to Rule Them All
After the base is set up, I install everything I actually use in one go:
yay -S mullvad-vpn discord partitionmanager steam vscodium warp-terminal-bin termius zen-browser bitwarden localsend postman signal-desktop zed spotify ttf-jetbrains-mono-nerd nodejs npm pnpm bun go gcc clang cmake ninjaThis covers:
- Development: VSCodium, Postman, Node.js ecosystem, Go, GCC, Clang (for formatting), CMake, Ninja
- Communication: Discord, Signal
- Browsing: Zen Browser, Chromium for web apps
- Entertainment: Steam, Spotify
- Security: Mullvad VPN, Bitwarden
- Utilities: LocalSend, Partition Manager, Termius
- Fonts: JetBrains Mono Nerd Font
AI-Assisted Development: Essential for Modern Productivity
AI has become an essential part of my development workflow. I install Claude Code alongside my other development tools:
curl -fsSL https://claude.ai/install.sh | shThe way I see it, AI fundamentally changes how we should spend our time as developers. Instead of grinding through boilerplate and syntax, I let Claude Code handle the initial code generation and focus my energy on the more valuable work: reviewing, auditing, and architecting solutions.
This shift in workflow means:
- Less time writing - AI handles repetitive patterns and boilerplate
- More time auditing - I spend energy reviewing logic, security, and architecture
- Faster iteration - Get to working prototypes quickly, then refine
- Better quality - More mental bandwidth for catching edge cases and potential issues
AI doesn’t replace thinking about code - it amplifies it. I’m shipping safer, higher-quality code faster because I can focus on the parts that actually require human judgment and experience.
Hyprland Configuration: Layered Approach
My Hyprland setup leverages Omarchy’s defaults and then overrides specific things. Here’s how ~/.config/hypr/hyprland.conf looks:
# Use Omarchy defaults firstsource = ~/.local/share/omarchy/default/hypr/autostart.confsource = ~/.local/share/omarchy/default/hypr/bindings/media.confsource = ~/.local/share/omarchy/default/hypr/bindings/tiling.confsource = ~/.local/share/omarchy/default/hypr/bindings/utilities.confsource = ~/.local/share/omarchy/default/hypr/envs.confsource = ~/.local/share/omarchy/default/hypr/looknfeel.confsource = ~/.local/share/omarchy/default/hypr/input.confsource = ~/.local/share/omarchy/default/hypr/windows.confsource = ~/.config/omarchy/current/theme/hyprland.conf
# Then override with my own customizationssource = ~/.config/hypr/monitors.confsource = ~/.config/hypr/input.confsource = ~/.config/hypr/bindings.confsource = ~/.config/hypr/envs.confsource = ~/.config/hypr/autostart.conf
# A bit of "look and feel" adjustments since omarchy doesn't want me to modify looknfeel.confdecoration {  rounding = 4
  # https://wiki.hyprland.org/Configuring/Variables/#blur  blur {    enabled = true    size = 3    passes = 2  }}
This way I get all of Omarchy’s sensible defaults, but I can override anything I want in my own config files.
Custom Keybindings: Quick Access to Everything
In ~/.config/hypr/bindings.conf, I set up my most-used applications and web apps:
# My essential appsbindd = SUPER, return, Terminal, exec, uwsm app -- alacrittybindd = SUPER, B, Browser, exec, uwsm app -- zen-browserbindd = SUPER, M, Music, exec, uwsm app -- spotifybindd = SUPER, G, Signal, exec, uwsm app -- signal-desktop
# Web apps using Chromiumbindd = SUPER, A, ChatGPT, exec, $webapp="https://chatgpt.com"bindd = SUPER SHIFT, A, Claude, exec, $webapp="https://claude.ai"bindd = SUPER, Y, YouTube, exec, $webapp="https://youtube.com/"bindd = SUPER SHIFT, G, WhatsApp, exec, $webapp="https://web.whatsapp.com/"
I use a dual-browser approach: Zen Browser for regular browsing and Chromium for web apps. The $webapp variable launches Chromium with the --app flag, creating isolated web app windows that feel more like native applications.
Input and Display Configuration
Input tweaks in ~/.config/hypr/input.conf:
input { kb_options = compose:caps,altwin:swap_alt_win repeat_rate = 40 repeat_delay = 600 sensitivity = -0.95 touchpad { scroll_factor = 0.4 }}I justreduce my sensitivity as I use 1600 DPI as its more precise than using 800 DPI. Hard to notice sure but gotta stay consistent.
Monitor setup in ~/.config/hypr/monitors.conf:
env = GDK_SCALE,1monitor=,preferred,auto,1I keep it simple with 1x scaling since I’m not using a high DPI monitor.
Terminal: Alacritty with Omarchy Theming
My ~/.config/alacritty/alacritty.toml is just editing the fonts to use the JetBrains Mono font.
[font]normal = { family = "JetbrainsMono Nerd Font", style = "Regular" }bold = { family = "JetbrainsMono Nerd Font", style = "Bold" }italic = { family = "JetbrainsMono Nerd Font", style = "Italic" }size = 16Clean, functional, and consistent with the overall theme.
Waybar: Minimal Styling Changes
Similarly for the status bar, I also just make tiny adjustments in ~/.config/waybar/style.css to change the font family, size and add some padding:
@import "../omarchy/current/theme/waybar.css";
* {  font-family: JetBrainsMono Nerd Font;  font-size: 15px;  padding: 2px;}
Other Fonts
# Install fonts for non english languagessudo pacman -S noto-fonts noto-fonts-cjk noto-fonts-extra
# Rebuild font cachefc-cache -fv
Why This Approach Works
Benefits of minimal base + Omarchy:
- Start with exactly what you need, no cruft
- Get professional theming and configuration without the learning curve
- Easy to customize since you understand what you’ve added
- Quick to replicate on new machines
Migration process:
- Fresh Arch install with
archinstall - Run
wget -qO- https://omarchy.org/install-bare | bash - Run my application installation one-liner
- Copy over my
~/.configcustomizations - Reboot and I’m back to exactly where I was
Development Environment
My development setup covers multiple languages and build systems for modern development:
- Languages: Node.js/JavaScript, Go for backend services, C/C++ development
- Build orchestration: CMake for configuration, Ninja for fast parallel builds (way faster than Make)
- Compilers: GCC for C/C++ compilation
- Code formatting: Clang-format for consistent C/C++ code style
- Multiple package managers: npm, pnpm, bun for different projects
- AI-assisted coding: Claude Code integrated into my workflow
- Code editor: VSCodium for development
- API development: Postman for testing and development
This combination lets me move fast while maintaining code quality. AI handles the grunt work, multiple package managers give me flexibility, and VSCodium gives me all the power of VS Code without Microsoft’s telemetry. Having Go and a complete C/C++ toolchain (CMake → Ninja → GCC pipeline with Clang-format for styling) means I can jump into systems programming or backend development without any setup friction.
This setup gives me a desktop that’s both minimal and polished, fast and beautiful, customizable and stable. It’s taken me a while to find this balance, but I’m really happy with how it works in practice.
← Back to blog